Quick Start
This guide walks you through the basics of ByteChef in a few minutes. You'll learn how to build a workflow quickly, so no much configuration needed.
In this tutorial, you'll learn:
- How to build a workflow quickly with ByteChef's Workflow Builder
- How to add and configure a component with data expressions
- How to execute workflow automations
Pick Your Platform
You have two ways to use ByteChef:
-
ByteChef Cloud: We host it. Zero installation. Best for testing and getting familiar with the platform. We'll use this for this guide.
-
Your own infrastructure (Self-Hosted): Deploy and run ByteChef yourself. Supported on:
If you're ready to selfhost, you can pick any of the platforms above for detailed setup instructions.
In this quickstart guide, we'll be working with the Cloud instance so you can dive in immediately. You can switch to self-hosted instance anytime after you finish this guide.
Step 1: Create a Project
- Go to your ByteChef dashboard on the Cloud or Self-hosted instance
- Click on
Create Project - Enter your project's name and description click
Create
Step 2: Create Your First Workflow
Inside your project:
- Click the
 button in the project pane
 - Give it a label (e.g., "Send Welcome Email")
- Click
Save.
Now, you now have a blank canvas in your workflow; let's build something.
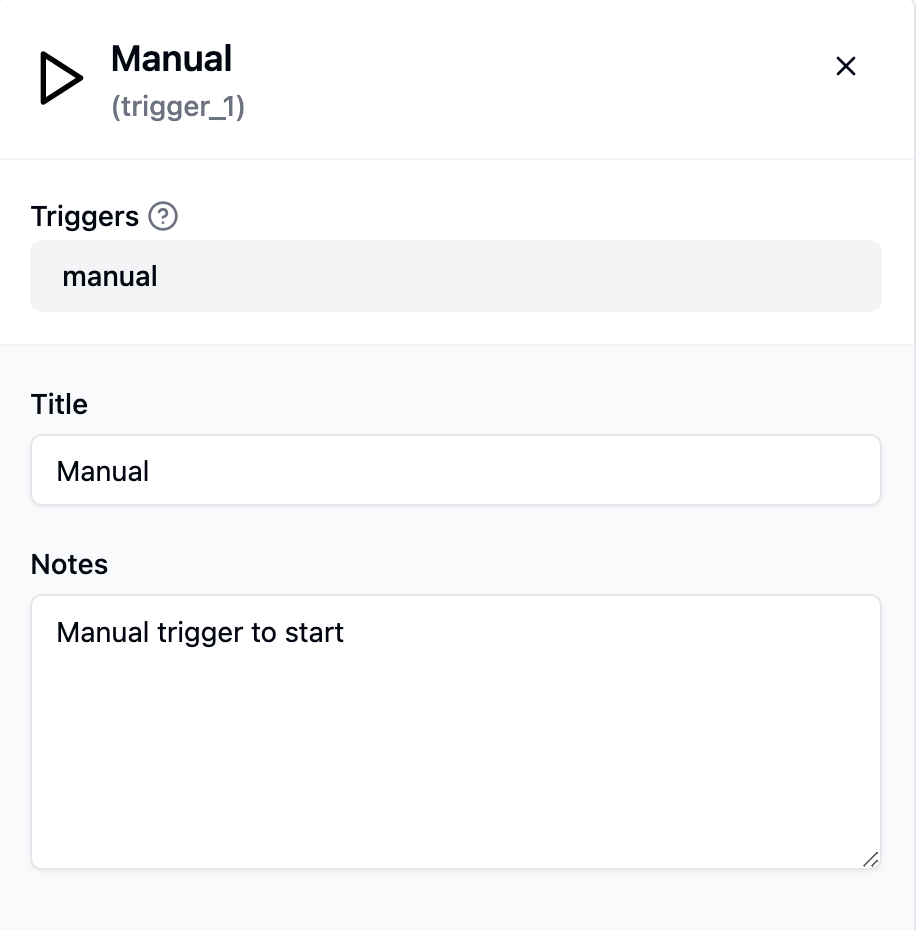
Step 3: Add a Trigger
Every workflow in ByteChef starts with a trigger, it's the event that kicks off your automation.
- Click the + button on the canvas
- Search for and select Manual Trigger (this lets you start the workflow by testing or deploying)
- Click to confirm
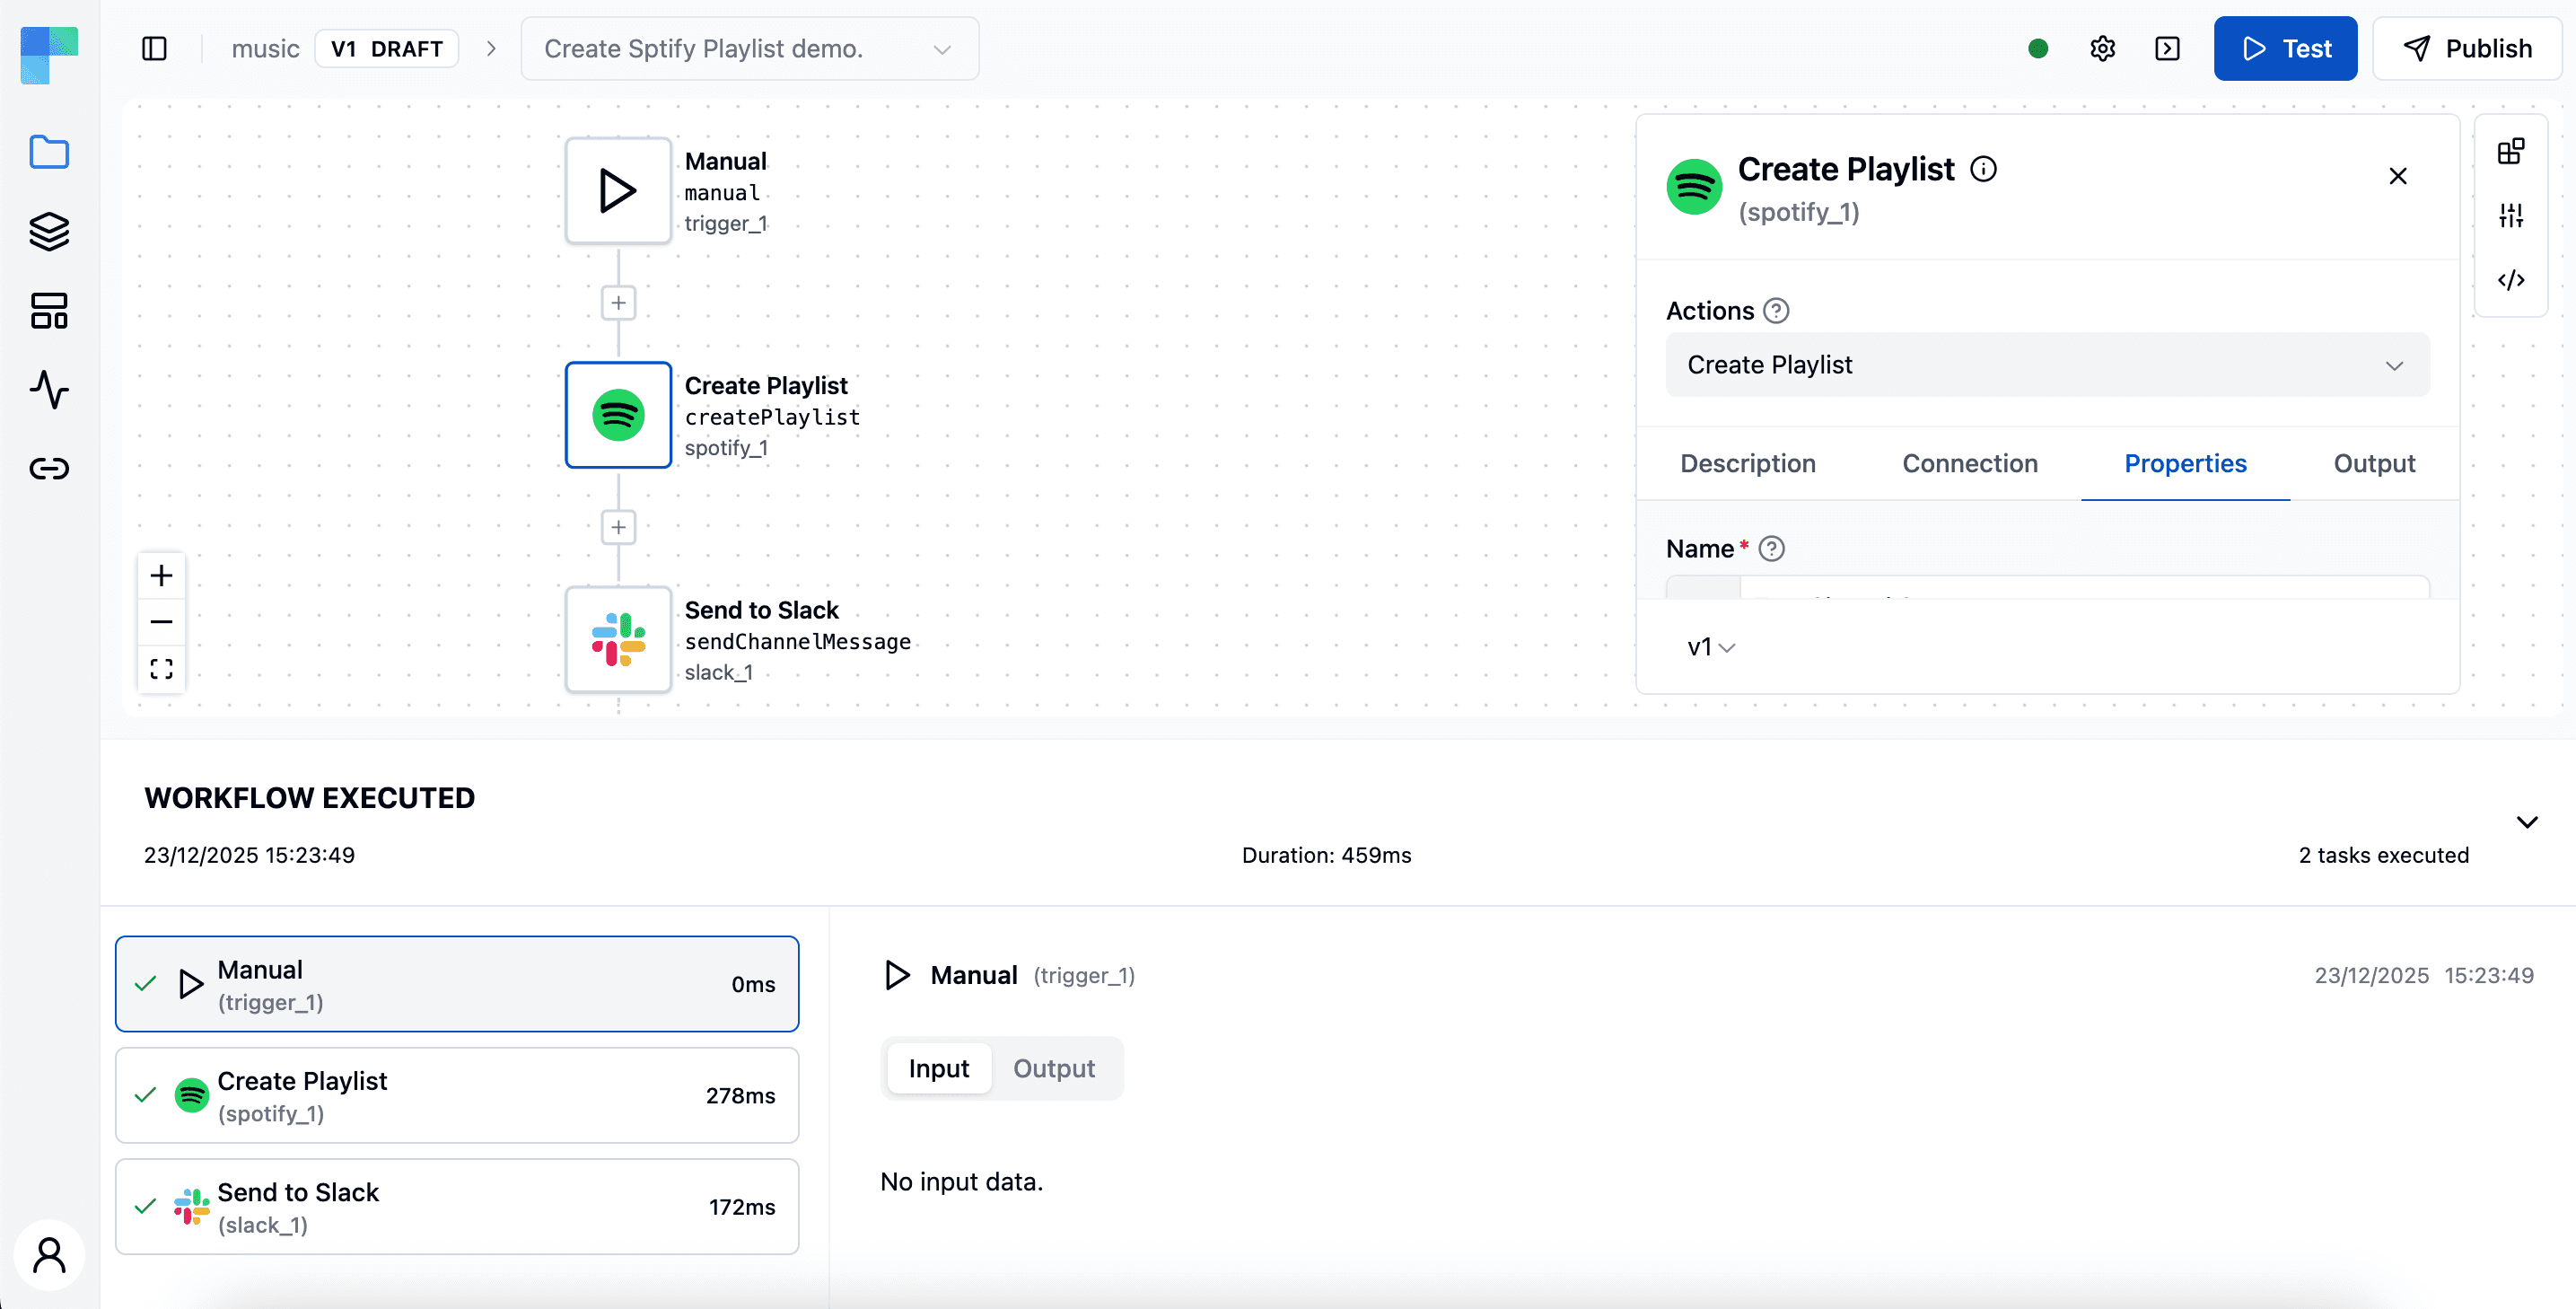
Step 4: Add and Configure Your First Component
Now, let's add a component that does something. Let's use the Spotify component to create a playlist and share with your teammates on Slack.
- Click the + icon after the Manual Trigger
- Search for Spotify
- Select Spotify and click to add it
- Select an action from the dropdown (the Create Playlist action)
- Configure the component:
- Make a connection with the component by providing your Spotify Client ID and Client Secret
- In the properties panel, provide the playlist name and description
- Select if you want the playlist to be public or private
- Select if you want the playlist to be collaborative or not
- Add the Slack component and select the Send Channel Message action
- Configure the component:
- Make a connection with the component by providing your Slack Bot User OAuth Access Token
- In the properties panel, provide the channel ID and message.
- In the message section of the Slack properties panel, click on the message tab and enter this expression:
🎵 New playlist created: Slack Shared Songs
Playlist:${spotify_1.external_urls.spotify}
Start adding your favorite songs!
Step 5: Test Your Workflow
Click the test button at the top right corner of the workflow. ByteChef runs your workflow:
- The Manual Trigger activates the workflow
- The Spotify component creates a playlist
- The Slack component sends a message to a channel
You'll see the execution results below:
Check your configured Slack channel to see a message in Slack:

What You've Built
Your workflow now looks like:
Manual Trigger → Spotify (Create Playlist) → Slack (Send Message)The demo in this quickstart demonstrates the core concept of automation:
- Trigger: Something starts the workflow
- Components: Do the actual work (create, fetch, send)
- Expressions: Pull data between components using
{{ $json.fieldName }}
Next Steps
Here are a few things you can explore next:
How is this guide?
Last updated on
What is ByteChef?
ByteChef is an open-source, enterprise-ready platform for building AI agents, automating workflows, and integrating applications across SaaS, APIs, and databases with flexible deployment.
Platform Architecture
ByteChef is an open-source, enterprise-ready platform for API integration and workflow automation.