
Workflows
Learn how to deploy projects and workflows in ByteChef.
Deploying workflows inside a project in ByteChef brings your automation to life. Deployment allows workflows to run independently without further user input, enabling seamless, hands-off execution of your automated processes.
Publishing and deploying are two operations
Building a workflow and running it in an environment are deliberately separate steps:
- Publish takes the project's current draft and freezes it as a numbered, immutable version. Every workflow in the project is snapshotted together; the editor then continues on a fresh draft, so nothing you type afterwards changes the published version.
- Deploy creates a project deployment: one published version bound to one environment, with its own name, tags, its own set of enabled workflows, and its own connection wiring.
That split is what lets you edit all afternoon without touching what is running, and what lets the same version run in Staging and in Production against different credentials - the artifact is identical, only the deployment around it differs.
What a version does and doesn't carry
A published version holds the workflow definitions - tasks, ordering, parameters, expressions, the component versions they reference, trigger configuration, and input and output schemas - plus the publish description and timestamp.
It does not hold connections or credentials. Connections are wired on the deployment, so the same version runs in Development against a sandbox account and in Production against the live one, and a credential rotation does not invalidate any version.
Reviewing versions
Open a project in the editor and use the Settings menu → Project tab → Project History. Each entry shows the version number, its published date, a Draft or Published badge, and the description supplied at publish time - which is why writing a real description at publish time is worth the ten seconds.
Rolling back
There is nothing to rebuild. Use Change Project Version on the deployment (below) to point it at the earlier version; the version is still stored and still runnable. Rolling forward again is the same operation in the other direction.
Hotfixes
Deployments run published versions, so a fix is not applied in place. Edit the draft, publish it, and change the affected deployment to the new version - a Production deployment can be pointed at a new version without first deploying it anywhere else, so this is no slower than editing live would be, and it leaves a version history behind.
Deploy Project
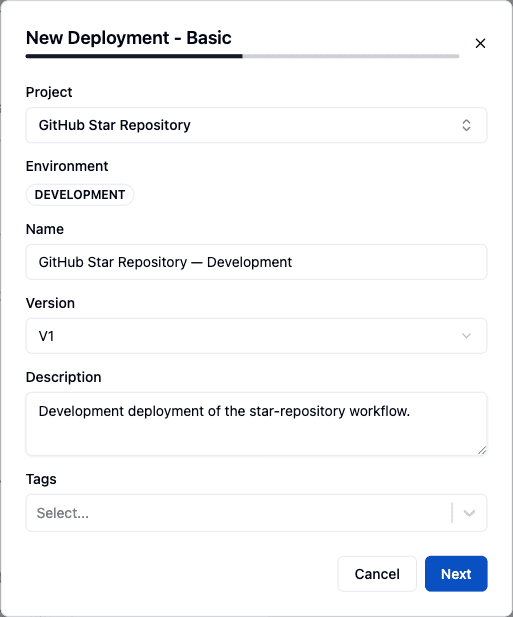
Once saved, the deployment appears in the list. Use the toggle on its row to enable it.

Go to Project Deployments.
Click on New Deployment (the button reads Create Deployment when no deployment exists yet).
Select Project you want to deploy.
Select Version you want to deploy.
Enter Name and Description of the deployment.
Select Environment to which you want to deploy the project.
Enter Tags for easier organization of deployments.
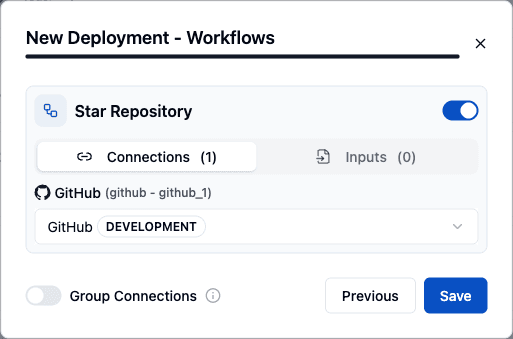
Enable desired workflows.
Set up required connections for the enabled workflows.
Click on Save.
Enable the project deployment.
Project is now deployed.
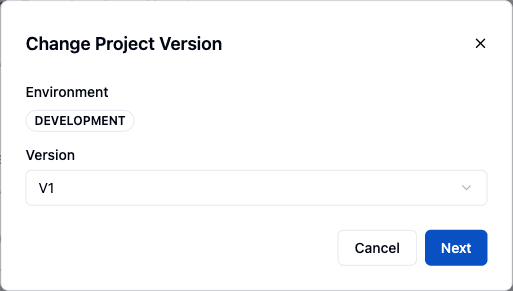
Update Project Version
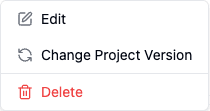
Click on the three dots next to the name of the project deployment you want to update.
Click on Change Project Version.
Select desired project version.
Click on Next.
Enable workflows you want to deploy.
Update connections if necessary.
Click on Save.
Update Project Deployment
Click on the three dots next to the name of the project deployment you want to edit.
Click on Edit.
Change name, description or tags.
Click on Save.
Update Workflow Connections
Click on the arrow under the project deployment name.
Click on three dots next to the name of the workflow you want to edit.
Click on Edit.
Click on + button.
Create new connection.
Click on Save.
Choose the new connection.
Delete Project Deployment
Click on the three dots next to the name of the project deployment you want to delete.
Select Delete from the dropdown menu.
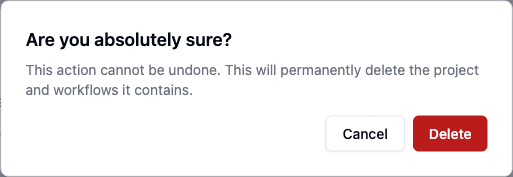
Confirm the deletion if prompted.
Get Webhook URL
A workflow that starts with a webhook (static) trigger exposes a webhook URL once its deployment is enabled. In the example below we added a static trigger to a workflow and deployed it to show how to retrieve that URL.
Click on the arrow under the project deployment name to expand its workflow list.
Find the workflow that uses a static webhook trigger.
Hover over the clipboard icon on that workflow row (tooltip: Copy static workflow webhook trigger url).
Click the icon to copy the webhook URL to your clipboard. Use this URL in the external service that should trigger the workflow.
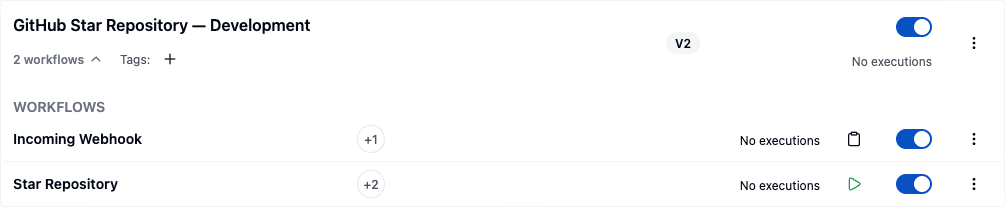
Workflows that start with a form or chat trigger show a form or chat icon instead of the clipboard icon - clicking it opens the hosted page rather than copying a URL.
How is this guide?
Last updated on