
Build First Workflow
Build and run your first ByteChef workflow in a few minutes. No connections or credentials needed.
In this guide you build the same workflow as the Learn ByteChef by doing template: a trigger, an HTTP call to a public API, and a logger that prints the result. It needs no connections, so it runs the moment you finish it.
You will learn:
- How to create a project and a workflow
- How to add and configure components
- How to pass data between steps with an expression
- How to test a workflow and read its execution log
Before you start
Sign in to ByteChef Cloud or run ByteChef yourself. The quickest self-hosted option is one command, with Docker Desktop installed:
docker run --name bytechef -it -p 8080:8080 \
    --env BYTECHEF_DATABASE=h2 \
    -v ~/.bytechef:/root/.bytechef \
    docker.bytechef.io/bytechef/bytechef:latest
Open http://localhost:8080/login and click Create account. This runs on an embedded H2 database and is meant for evaluation. For anything you intend to keep, use PostgreSQL through Docker Compose, or see the guides for Kubernetes, AWS EC2, AWS ECS, Azure, Google Cloud and DigitalOcean.
On first sign-in you land in the Automation workspace.
Create a project
A project is the container that holds your workflows.
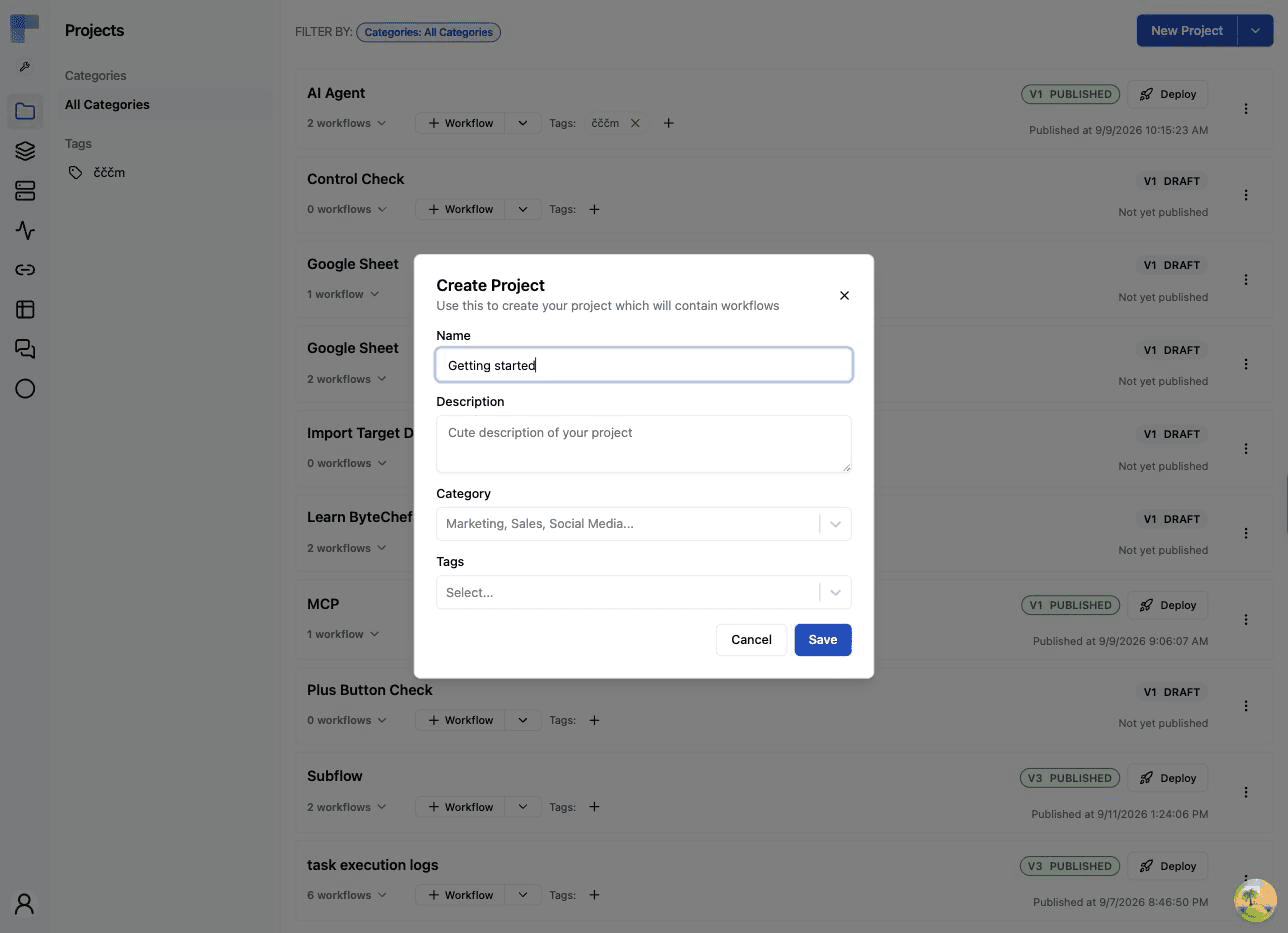
Open the Projects page and click New Project. On a fresh instance the button reads Create Project.
Enter a project name, for example Getting started. Optionally add a description, choose a category, and add tags. Then click Save.
Create a workflow
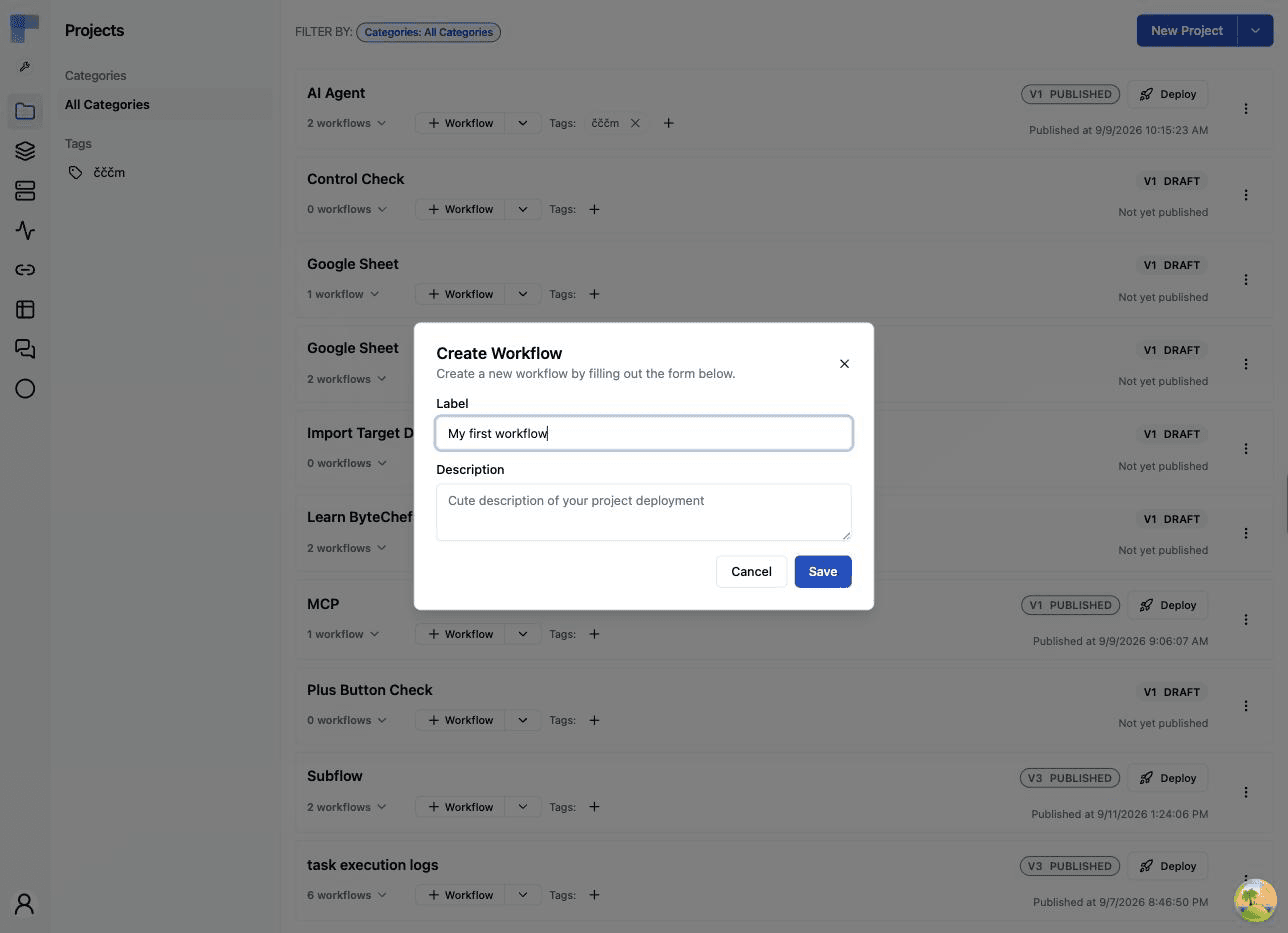
On your new project's row, click + Workflow.
Enter the label Learn ByteChef by doing and click Save.
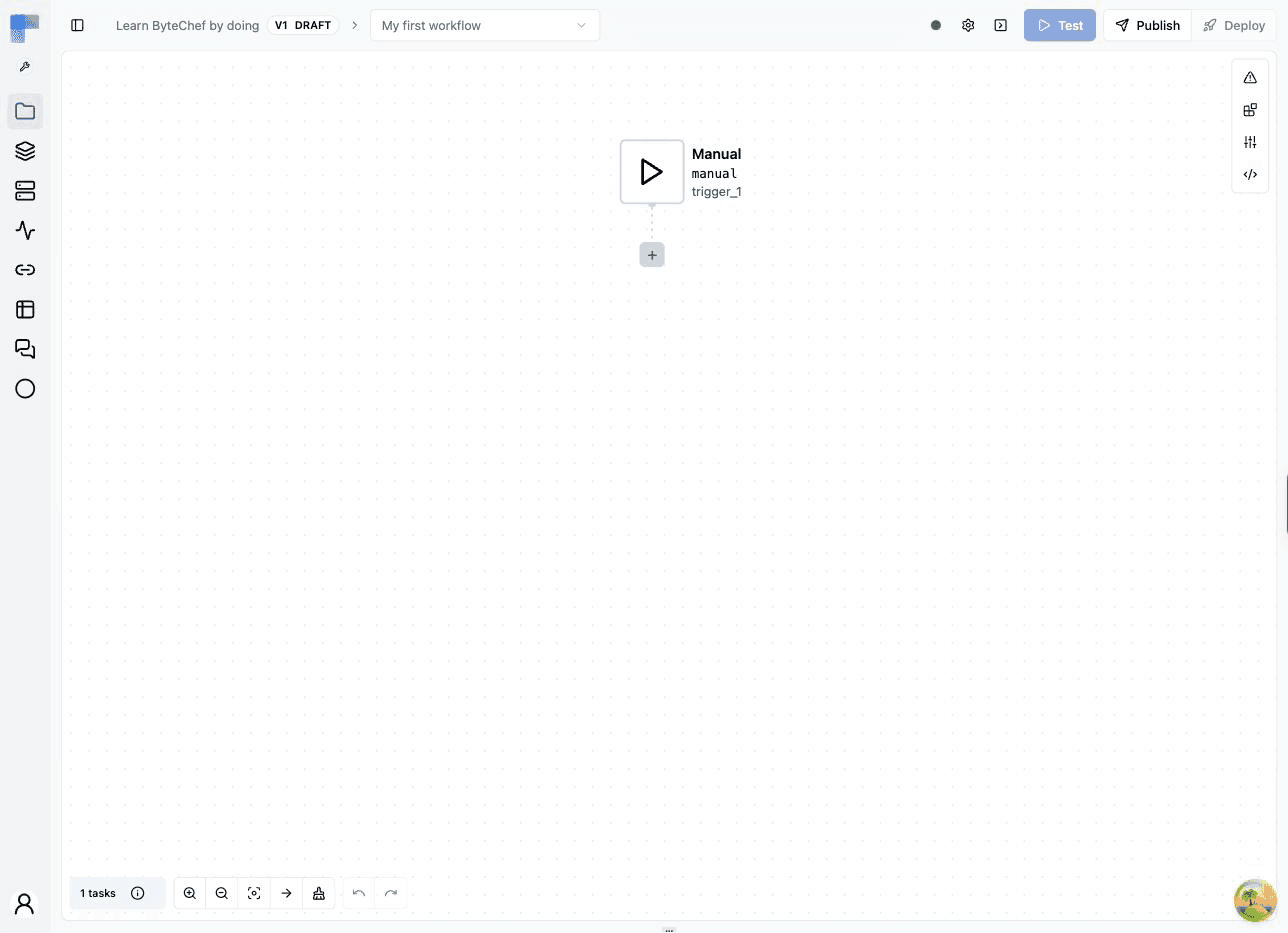
ByteChef opens the new workflow in the editor with a Manual trigger already in place. The Manual trigger starts the workflow when you click Test or Run.
Fetch a random quote
Click the + button below the trigger, search for HTTP Client, and select it. Choose the GET action.
The step's panel opens on the right. Open its Properties tab and set URI to:
https://dummyjson.com/quotes/randomLeave Response Format on JSON and everything else at its default. There is no connection to create: the API is public.
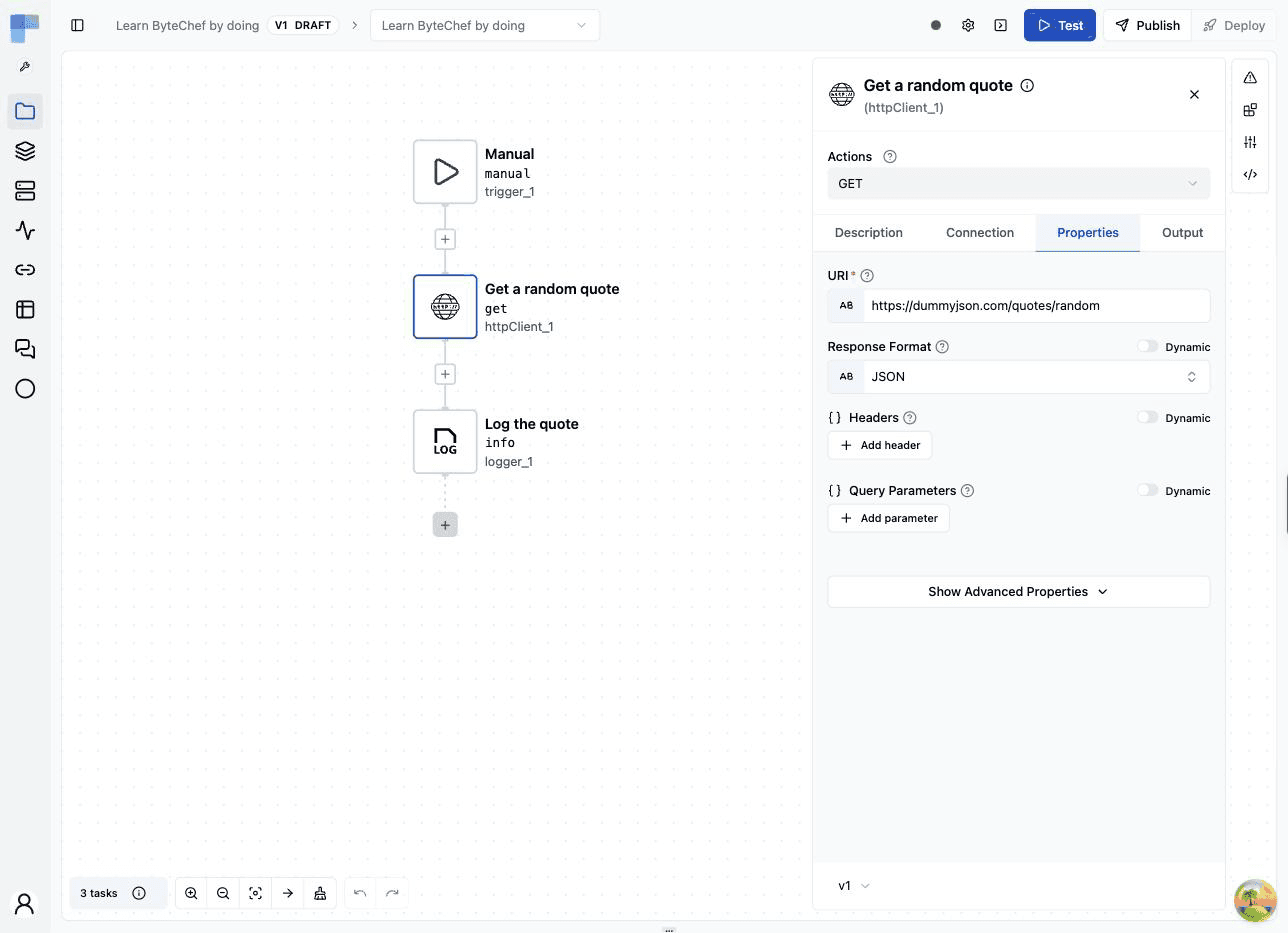
Optionally rename the step on the Description tab, for example to Get a random quote. The step's name, httpClient_1, is what other steps use to reference its output; it does not change when you edit the title.
Log the quote
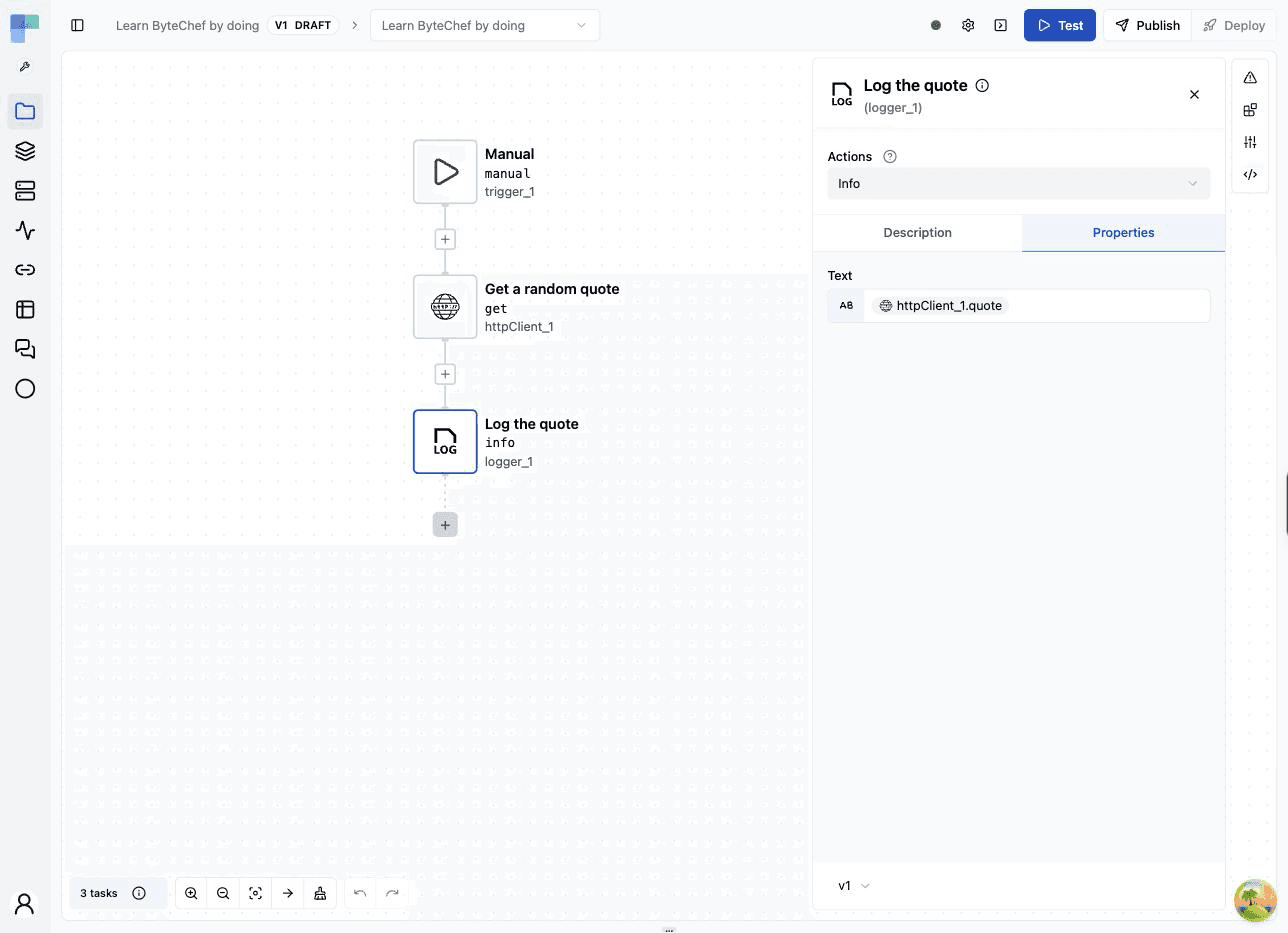
Click the + button below the HTTP Client step, search for Logger, and select it. Choose the Info action.
On the Properties tab, enter this expression in the Text field:
${httpClient_1.quote}This is a data pill: it pulls the quote field out of the JSON the HTTP Client step returned. The editor shows it as a chip once you leave the field. You can also open the field's data picker and click the quote field under httpClient_1 to insert the same expression.
Test the workflow
Click Test at the top right of the editor. ByteChef runs the workflow once:
- The Manual trigger starts it
- The HTTP Client step calls the quotes API
- The Logger step prints the quote
The execution panel opens below the canvas. Click the Logger step and open its Logs tab: the quote is there. Click the HTTP Client step to see the full JSON it received on its Output tab.
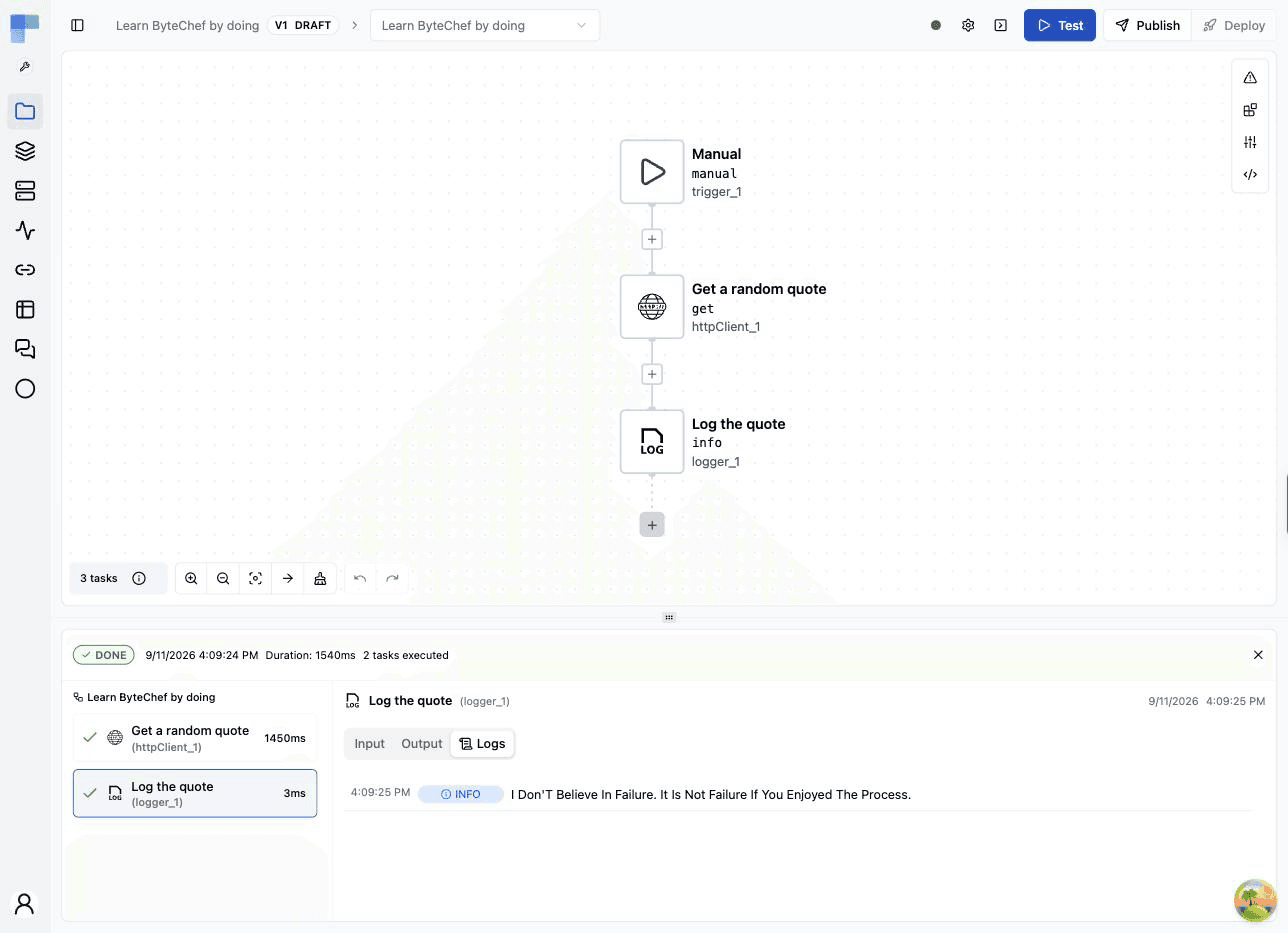
Run it again and you get a different quote.
What you have built
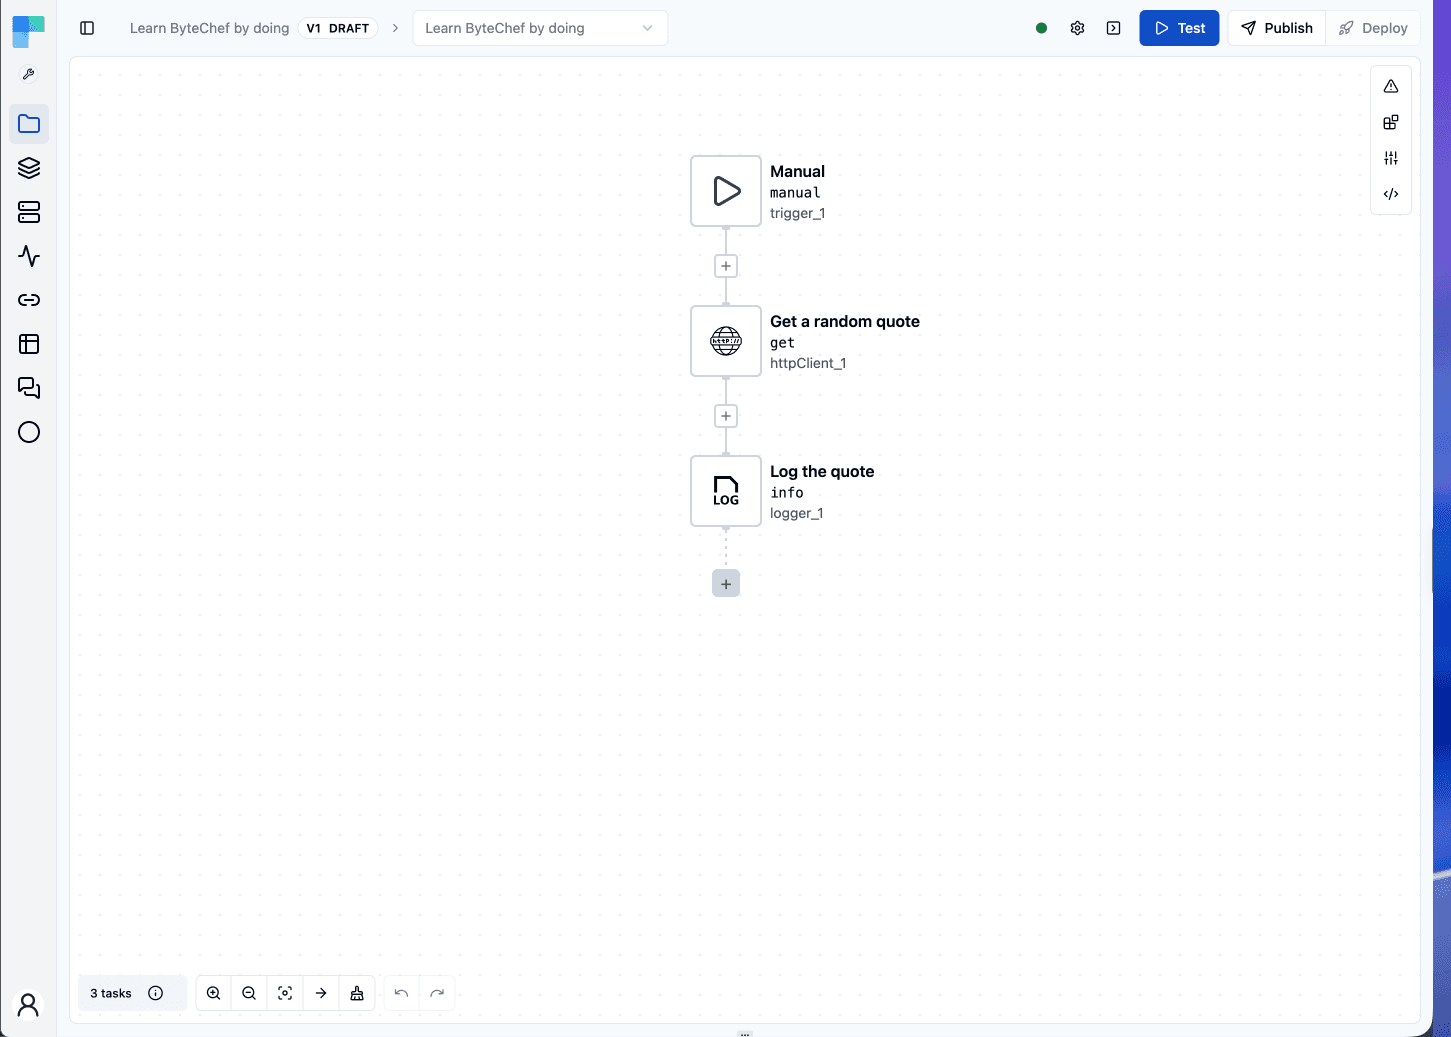
This is the shape of every ByteChef workflow:
- Trigger: something starts the workflow
- Components: do the work, such as fetching, creating or sending
- Data pills: pass data between steps with
${stepName.fieldName}. See Data Pills & Input Modes
The same workflow is available as a template. To import it instead of building it, open the Learn ByteChef by doing page, click Use template, and then click Test in the editor.
Next steps
- Build First Agent: add an AI agent with a tool, with one API key
- Star Repository on GitHub: your first workflow with a connection
- Configure Workflow Trigger: a real trigger, a deployment and monitoring
- Browse 250+ components
- Templates library
How is this guide?
Last updated on