
Projects
Learn how to create, manage, and organize projects within ByteChef.
Every project on ByteChef consists of one or more workflows. Projects help organize and manage workflows, making it easier to group related automation processes together.
A project is the unit you publish
A project is not only a folder. It is the thing that gets versioned and deployed, so where you draw the project boundary decides what ships together.
- Workflows in one project are published together. Publishing snapshots every workflow in the project into one immutable version - you cannot publish half a project.
- Versions are immutable. Once a version is published, its workflows are frozen; further edits go to a fresh draft. A published version is what a deployment runs, and it stays available for rolling back. See Deploy Workflows.
- Deployment is separate from publishing. A project deployment binds one published version to one environment, with its own connections and its own set of enabled workflows. The same version can be deployed to several environments.
- A project belongs to exactly one workspace. Data tables, knowledge bases, and connections are workspace-scoped, so they are shared across the workspace's projects rather than owned by one of them. See Workspaces.
Access is governed by workspace roles - Admin, Editor, or Viewer - granted per member on the workspace and applying to every project inside it. There are no per-project roles.
A project has two states, not three: a live draft that the editor writes to, and any number of published versions. Deleting a project is permanent - export it first if you might want it back.
Create Project
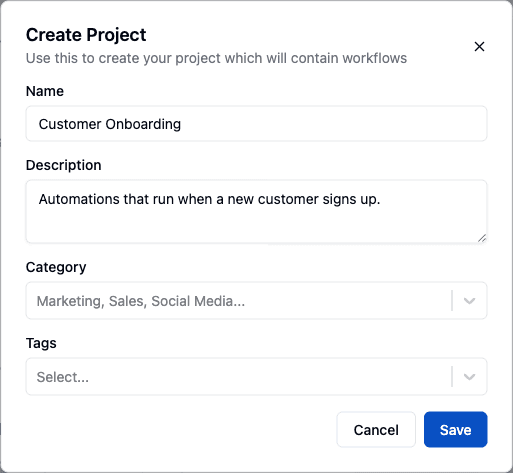
Navigate to the Projects tab.
Click on the New Project button located in the top right corner.
Enter a name for your project. Optionally, provide a description, select a category, and add relevant tags.
Click Save.
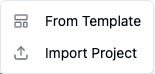
The dropdown arrow next to the New Project button offers two more ways to start a project: From Template and Import Project.
Create Project from Template
Click the dropdown arrow next to the New Project button in the top right corner.
Select From Template from the dropdown menu.
Browse the template gallery, pick a pre-built or community-shared project template, and import it.
For details on the gallery and the import flow, see Templates.
Import Project
Click the dropdown arrow next to the New Project button in the top right corner.
Select Import Project from the dropdown menu.
Choose the project archive (.zip) file exported from ByteChef.
The imported project, together with its workflows, appears in the project list.
New Code Workflow
Coming soon
Creating a code workflow from the Projects page is on the upcoming release track and is not yet available in the latest released version of ByteChef. Today a code workflow is authored outside the product and deployed through the API - see Code Workflows.
Click the dropdown arrow next to the New Project button in the top right corner.
Select New Code Workflow from the dropdown menu.
Give the code workflow a name and pick its language, then edit the workflow definition directly in code.
A code workflow runs on the same engine as a visually built one - see Build Approaches for when to choose full-code.
Edit Project
Locate the project you wish to edit and click on the three dots next to its name.
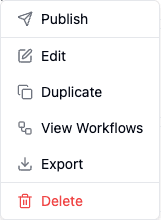
Select Edit from the dropdown menu.
Modify the project name, description, category, or tags as needed.
Click Save to apply your changes.
Duplicate Project
Find the project you want to duplicate and click on the three dots next to its name.
Select Duplicate from the dropdown menu.
The duplicated project will appear in the project list with the same name followed by a numerical suffix (e.g., Project Name (1)).
Export Project
Click on the three dots next to the project name you wish to export.
Select Export from the dropdown menu.
A project archive (.zip) containing the project and all of its workflows downloads to your computer. Use it to back up a project or import it into another workspace or ByteChef instance.
Create Workflow

Click + Workflow on the row of the project you want to add a workflow to.
Enter a label for your workflow and optionally provide a description.
Click Save to create the workflow.
Import Workflow
Click the dropdown arrow next to the Workflow button on the project where you want to import a workflow.
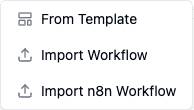
Select Import Workflow from the dropdown menu.
Choose the JSON file containing the workflow you wish to import.
Import n8n Workflow
Click the dropdown arrow next to the Workflow button on the project where you want to import a workflow.
Select Import n8n Workflow from the dropdown menu.
Choose the JSON file exported from n8n.
ByteChef converts the n8n workflow and adds it to the selected project.
Publish Project
Click on the three dots next to the project name you wish to publish.
Select Publish from the dropdown menu.
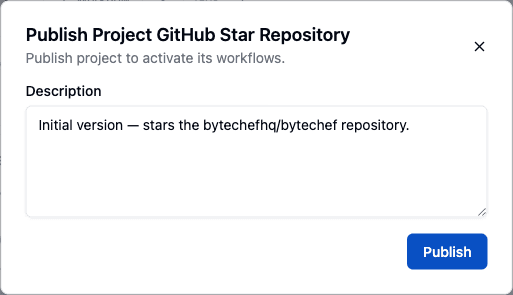
Provide a description for this published version to document any changes or updates.
Click Publish to make the project available.
Share Projects and Workflows as Templates
Beyond exporting a project to a .zip file for your own backups, a project - or
an individual workflow, from its own three-dot menu - can be shared as a template that anyone
with the link can import into their own workspace.
Click on the three dots next to the project (or workflow) name and choose Share.
Write a Description of what it does - this is required before you can export it.
Click Export and generate template link. The dialog turns into a link card with a Copy link button; anyone who opens the link can import it through /import/shared/projects/{uuid} (workflows use /import/shared/workflows/{uuid}).
Use the toggle at the top of the dialog to disable the link at any time - the existing link stops working - and to re-enable it later, which generates a fresh export.
If you keep editing the project after sharing it, the dialog notes that "an older version... is shared as a template" and offers an Update template based on the current version button, so the link always points at what you intend.
A second, separate action - Share with Community - opens ByteChef's public template submission form in a new tab, for projects and workflows you want listed in the official gallery (see Templates) rather than shared privately by link.
Delete Project
Locate the project you want to delete and click on the three dots next to its name.
Select Delete from the dropdown menu.
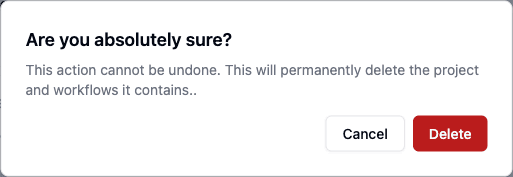
Confirm the deletion if prompted.
How is this guide?
Last updated on